
Hello to, All My Dear Readers, Followers and My Blogging Friends ❤
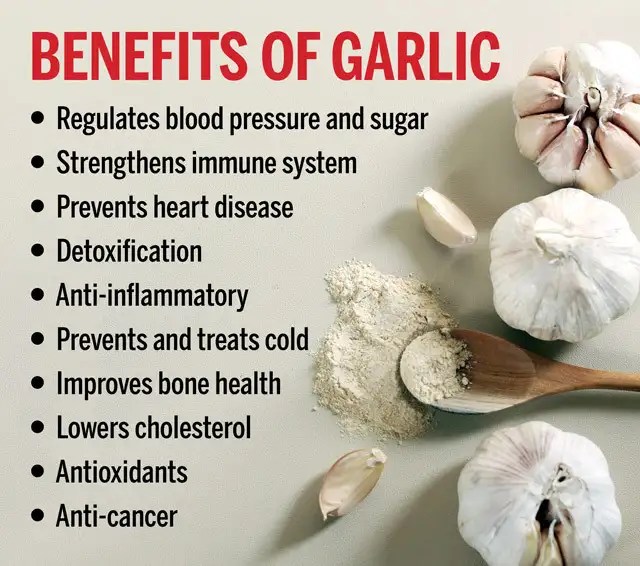
Hope all of you are keeping well. It’s very very cold but I am continuing to write, being on Ayurveda I thought of Enlightening on Values of Food for being in Good Health. As so many are not aware of the Values of Fruits and Vegetables and most importantly Herbs 🙂

From Seed to Bulb: Understanding 10 Garlic Growth Stages
Curious about how garlic grows? This guide will show you the different garlic growth stages, from when it starts sprouting to when it’s ready to be harvested. You’ll also learn some cool facts about how garlic grows.
Whether you like cooking, gardening, or learning new things, this guide is perfect for you!
Garlic Growth Stages
Garlic belongs to the Allium family, which includes onions, leeks, shallots, and chives. Garlic is a perennial plant, meaning that it can live for more than two years. However, it is usually grown as an annual crop, meaning it is harvested in one growing season.
Garlic has a complex life cycle that involves 10 stages of growth and development. Understanding these stages can help you plan your planting, care, and harvesting of garlic.
Here are the main stages of garlic growth:
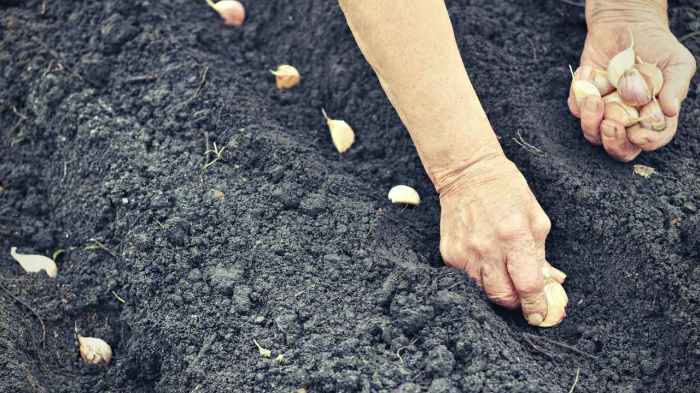
Stage 1. Planting
Stage 2. Germination
Let us discuss each stage in more detail.
The first stage of garlic growth is planting. Garlic is usually planted in the fall, about 4 to 6 weeks before the first frost date in your area. This allows the garlic to establish roots and shoots before the winter. Garlic can also be planted in the spring, as soon as the soil can be worked, but the bulbs may be smaller and less flavorful than fall-planted garlic.
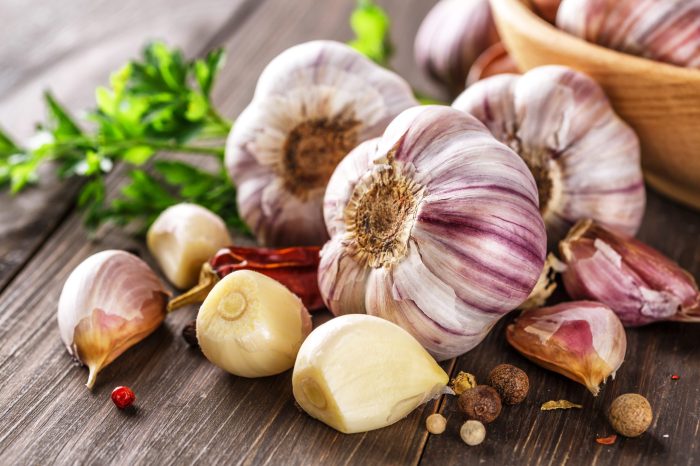
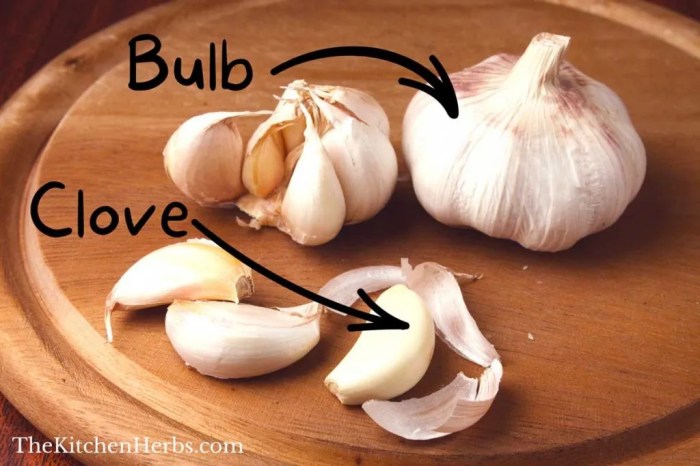
To plant garlic, you need to break apart the garlic bulb into individual cloves. Each clove will grow into a new bulb. Choose large, healthy cloves from disease-free bulbs.
Discard any cloves that are soft, shriveled, or damaged. You can plant the cloves directly into the soil or pre-sprout them in a moist paper towel for a few days to speed up germination.
Plant cloves about 2 inches (5 cm) deep and 4 to 6 inches (10 to 15 cm) apart in rows that are 12 to 18 inches (30 to 46 cm) apart.
Make sure the cloves pointed end faces up and the flat end faces down. Cover the cloves with soil and water them well. Also, add mulch, such as straw, leaves, or woodchips, to keep the water from evaporating from the soil and to protect the garlic from weeds.
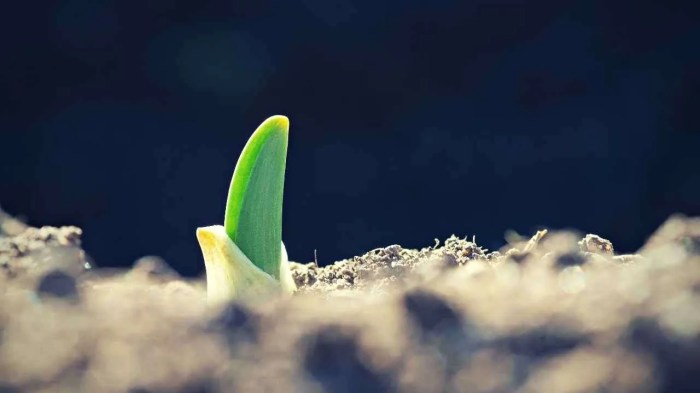
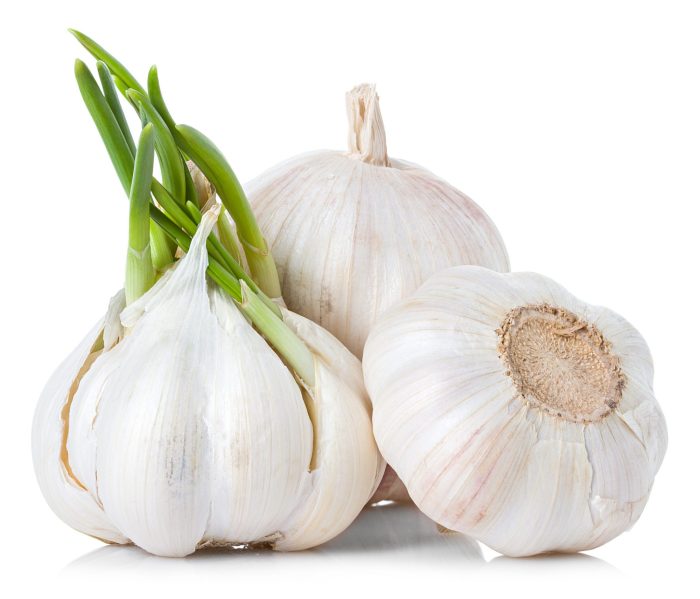
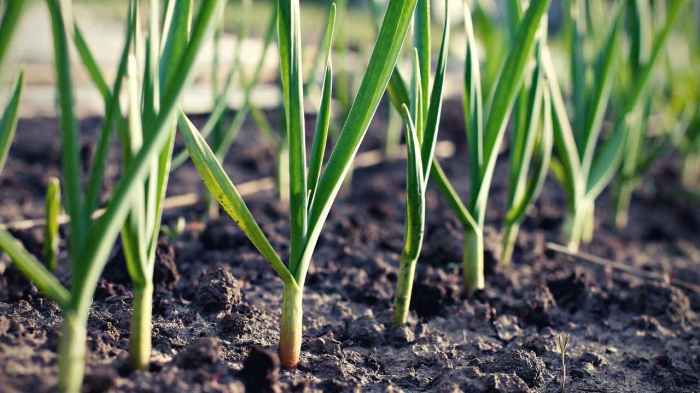
The second stage of garlic growth is germination. This is when the garlic clove starts to sprout roots and shoots. When planted in the fall, the shoots will only be visible above the ground in mid-spring.
The roots will grow downward into the soil, anchoring the garlic plant and absorbing water and nutrients. The shoots will grow upward through the soil, forming green leaves that will photosynthesize and produce energy for the plant.
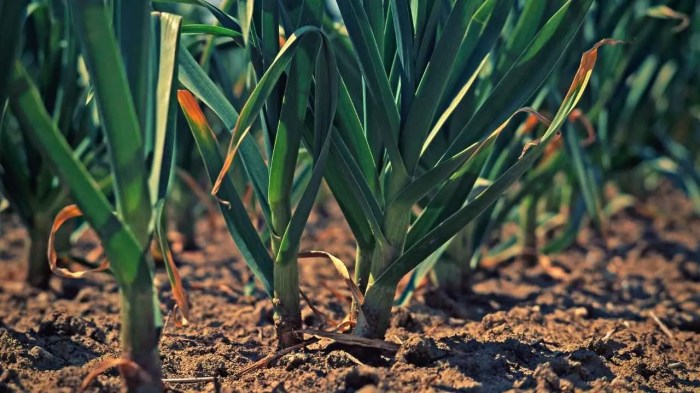
The third stage of garlic growth is vegetative growth. This is when the garlic plant grows taller and produces more leaves. The number of leaves a garlic plant produces will determine the size and shape of its bulb. Each leaf corresponds to a layer of bulb wrapper that will protect the cloves inside. [1]
Vegetative growth usually lasts from spring to late summer. The garlic plant needs plenty of sunlight, water, and nutrient-rich soil to grow well during this stage.
Pro Tip 1: Weed your garlic bed frequently to prevent competition for resources. Mulch will significantly reduce the amount of weeds that can sprout.
Pro Tip 2: If your soil is not nutrient-rich, apply an organic fertilizer in later.
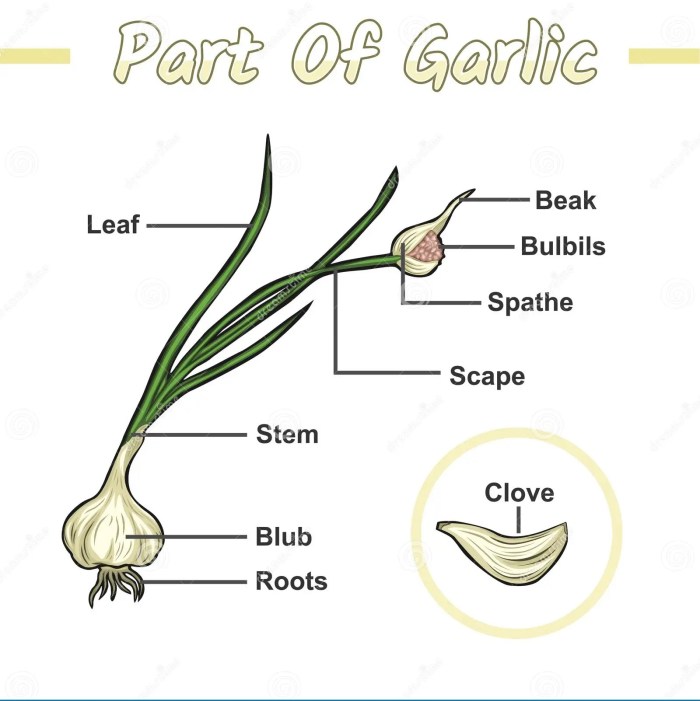
The fourth stage of garlic growth is bulb development. This is when the garlic plant starts to form its bulb underground by swelling its stem base and dividing it into cloves. Bulb development usually begins in early summer.There are two main types of garlic: hardneck and softneck. Hardneck garlic produces a hard stem or scape that grows from the center of the bulb and curls into a loop or coil at the top. The scape also produces a flower head or umbel that contains tiny bulbils or seeds that can be used for propagation. Softneck garlic does not create a scape or flower head but instead produces more cloves per bulb.
Several factors influence bulb development, such as temperature, moisture, soil type, nutrient availability, and garlic variety selection. Generally, warmer temperatures and drier conditions favor larger bulbs with fewer cloves. In comparison, cooler temperatures and wetter conditions favor smaller bulbs with more cloves.
You should reduce watering your garlic once bulbing begins, but do not let the soil dry out completely. You can also remove the scrapes from hard neck varieties to direct more energy to the bulb formation.
Pro Tip: While it is true that removing scapes from hardneck varieties will direct more energy to the bulb formation. However, if you leave them on, they will produce beautiful flowers that attract pollinators to your garden.
Stage 5. Harvesting Leaves

The fifth stage of garlic growth is harvesting leaves. This optional stage involves gathering some of the garlic leaves for culinary or medicinal purposes. Garlic leaves have a mild garlic flavor and can be used fresh or dried in salads, soups, sauces, pesto, and other dishes. [2]
Harvesting leaves can be done anytime during the vegetative growth or bulb development stages. However, do it before leaves start to yellow or die back. You should only harvest a few bottom leaves from each plant, leaving at least four to six leaves intact to support bulb growth. Also, avoid damaging the stem when harvesting leaves.
To harvest garlic leaves, use a sharp knife or scissors to cut off the desired amount of leaves on the plant. Wash the leaves and use them immediately or store them in the refrigerator for up to a week.
Pro Tip: You can dry garlic leaves by hanging them in a well-ventilated area away from direct sunlight for a few weeks. You can then store the dried leaves in an airtight jar in a cool, dark place for up to a year.
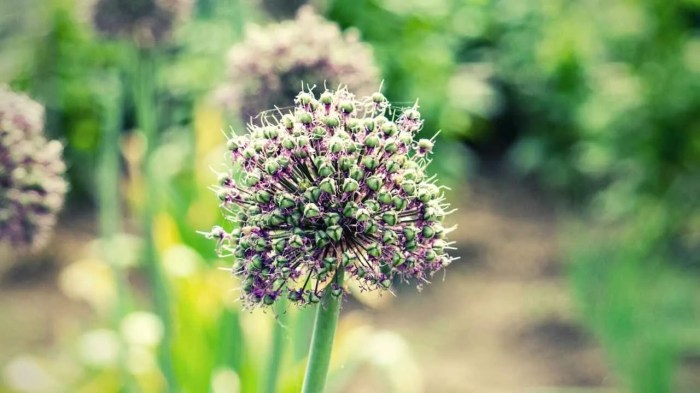
If you are growing hardneck varieties and leaving the scapes uncut, the next stage of garlic growth is flowering. This is the stage when garlic plants produce flowers that can attract pollinators and produce seeds. If the scrapes are cut or you are growing soft neck varieties, skip to “Stage 9. Garlic Harvest“.
Flowering is a reproductive process that happens in mid to late summer and allows the garlic plant to produce seeds. However, flowering also reduces the size and quality of the garlic bulb, as the plant diverts its energy and resources from bulb formation to seed production.
To prevent flowering, remove the scapes from your garlic plants as soon as they appear. This will allow the plant to focus on bulb development and increase your yield and quality of garlic. You can also use the scrapes as a culinary or medicinal ingredient, as they have a similar flavor and texture to garlic cloves. [3],
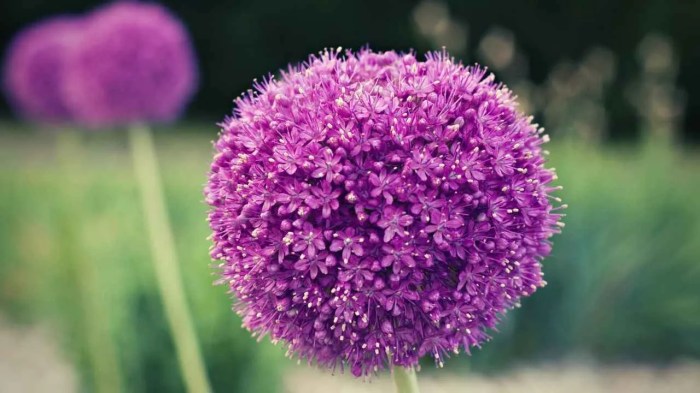
If you want to allow flowering, leave the scapes on your garlic plants and let them grow and curl into loops or coils. The scapes will eventually straighten up and produce a flower head or umbel at the top.
The flower head will contain hundreds of tiny flowers that can be white, pink, purple, or green. The flowers will attract bees, bumblebees, hoverflies, butterflies, and other pollinators that can transfer pollen from one flower to another.
Stage 7. Pollination
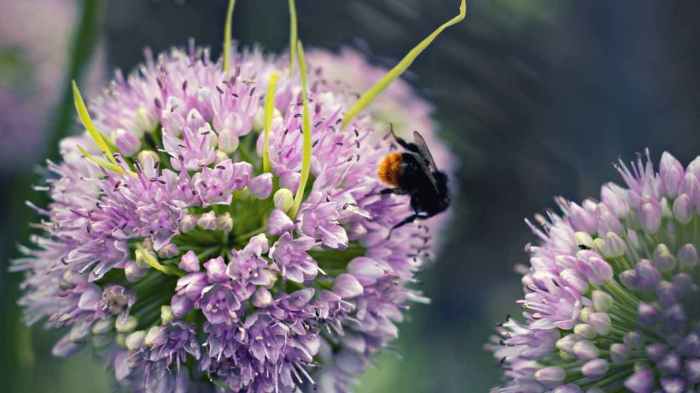
The seventh stage of garlic growth is pollination. This is when the garlic flowers receive pollen from other garlic plants or their own flowers. Pollination usually occurs shortly after flowering.
Pollination is a process that allows the garlic plant to exchange genetic material with other garlic plants and create new combinations of traits. Pollination can increase the genetic diversity and variability of garlic, which can help it adapt to different conditions and resist pests and diseases. However, pollination can also introduce unwanted or undesirable traits that can reduce the yield and quality of garlic.
Pro Tip: You can also manually pollinate your garlic plants by transferring pollen from one flower to another using a brush or just using your fingers. You can choose which plants to pollinate based on their characteristics, such as size, shape, color, flavor, or disease resistance.
The next garlic growth stage is seed formation. This is when the garlic flowers develop seeds inside their ovaries after being pollinated. Seed formation usually occurs in late summer or early fall, several weeks after pollination.
Seed formation is a process that allows the garlic plant to produce offspring that can grow into new plants. Seed formation can create new varieties and types of garlic that may have different or improved traits than their parents. However, seed formation can also take a long time and require much care and attention to produce viable seeds.
To harvest your seeds, wait until the flower heads turn brown and dry up completely. You should then cut off the flower heads from the plants and place them in a paper or mesh bag. Store the bag in a cool, dry, dark place until you are ready to extract the seeds.
To extract your seeds, you should break open the flower heads and separate the seeds from the chaff (the dried petals and other parts of the flower). Dry the seeds thoroughly before storing them in an airtight container in a cool, dark place. You can store garlic seeds for up to a year. After that, some seeds will become nonviable.
Pro Tip: While the idea of growing garlic from seeds might be intriguing, this process is considerably challenging and isn’t commonly undertaken by most gardeners. Garlic grown from seeds tends to exhibit more variability. It can take significantly longer to mature compared to garlic grown from cloves. Given the complex care and patience required, many gardeners select a more reliable and efficient method of planting cloves for a successful harvest.
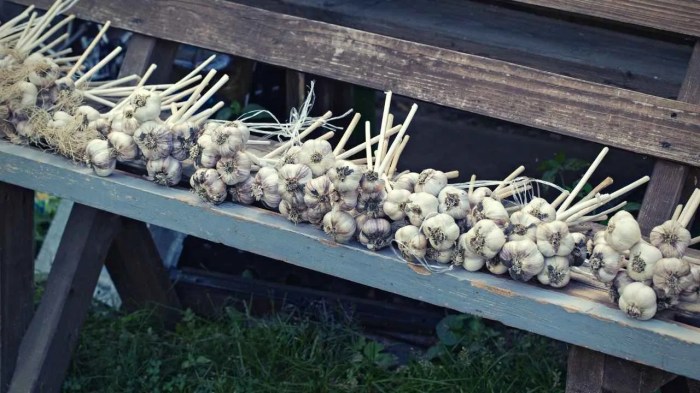
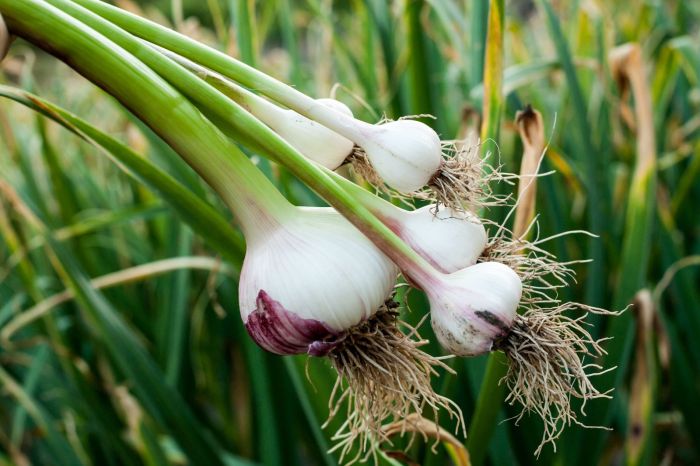
The ninth stage of garlic growth is garlic harvest. This is when the garlic bulb reaches its full size and quality and is ready for harvest.
The main indicator of harvest readiness is the condition of the garlic leaves. When about half of the leaves have turned yellow or brown and started to dry up, it means that the bulb has stopped growing and is ready to be harvested.
Pro Tip: If you are unsure that your garlic is ready to be harvested, gently dig up one or two bulbs and examine them. The bulbs should be firm, plump, and well-formed, with distinct cloves and intact wrappers. The cloves should be easy to separate from each other and from the stem base.
Then, the moment comes when you dig up your garlic bulbs from the soil and prepare them for storage or use. Garlic harvest should be done on a dry and sunny day when the soil is not too wet.
To harvest your garlic, you need a spade, garden fork, or a garden knife to loosen the soil around each plant and lift it out gently. You should avoid pulling the plant by its stem or leaves, as this may damage the bulb or cause it to detach from the stem base. Also, avoid bruising or cutting the bulb, which may reduce its quality and shelf life.
After removing your garlic from the ground, shake off any excess soil from the bulbs and roots. Do not wash your garlic if you intend to store it for a long time, as this may introduce moisture and bacteria that can cause rotting or molding. Also, remove any damaged, diseased, or infected bulbs and discard them.
Harvest is the last stage of garlic growth unless you leave a bulb or a clove in the soil. If so, the garlic growth stage continues the following year.
https://www.youtube.com/watch?v=w7tGlfJXkbI
https://www.youtube.com/watch?v=w7tGlfJXkbI
Final Words
Garlic growth stages unveil a fascinating tale of transformation from a single clove to a thriving plant. Remember, successful garlic cultivation blends science and care.
Whether you’re a cook, gardener, or curious learner, embracing these insights can elevate your connection to nature’s rhythms.
So, relish the journey from soil to plate, letting the stages of garlic growth inspire your future culinary and gardening adventures.
I hope this article was helpful in explaining garlic growth stages.
Latest Update: 7th of July 2025. The website continues for the New and old Readers, Followers and Blogging Friends. Hope what I have written is useful that helps you to feel more Positive and Happier This is “The 278th Post” and with the “Introductory Page this will be all in Total up to date, 279 posts. On Top Right-Hand side, you are able to see: The word “Menu” when you click on it. You will see the word “Home” All the posts from “The Very Beginning comes ~ Under “Home”. Which is The Introductory Page about: Who I am & Why I am Writing!
The new Topics “On the Left-Hand side “Under the Recent Posts, with “The latest Topics adding up” Happy Reading ❤
The coloured Topics in Green, if you “Click” on them “Will take you to My other posts which you will be able to find more information”. I have another website with “My own little Poems and Pictures of some of My Hobbies” if you are interested on seeing, “What else I am doing” you can have a look at :https://deepanilamani.com/
As always, it is all free”. You can share and pass it on also for others who can benefit from this post. I hope All those who Read will be able to make the maximum use of all these facts and make, “Your Lives More Healthy and able to Lead Better lives in Happiness and Peace”. I wish it to be so as,” Peace which is our Ultimate Goal in Life ❤
This site has been doing good, and I am so Happy. I have been getting, 🎉 Congrats! I am My Path is getting noticed. Thanking the I net for the Picture Quotes I have shared from the I net ❤
Many Blessings for Good Health, Happiness and Prosperity! ❤
May God’s Blessings Be Upon You ❤


 Deepa Nilamani 🙂


You must be logged in to post a comment.